Convert casual website visitors into high-quality sales leads. Learn how to design click-to-chat widgets, verify user opt-ins, and build automated lead capture pipelines using Waplix and the WhatsApp Business API.
Jul 1, 2026 11 min read By Waplix Team
Share:
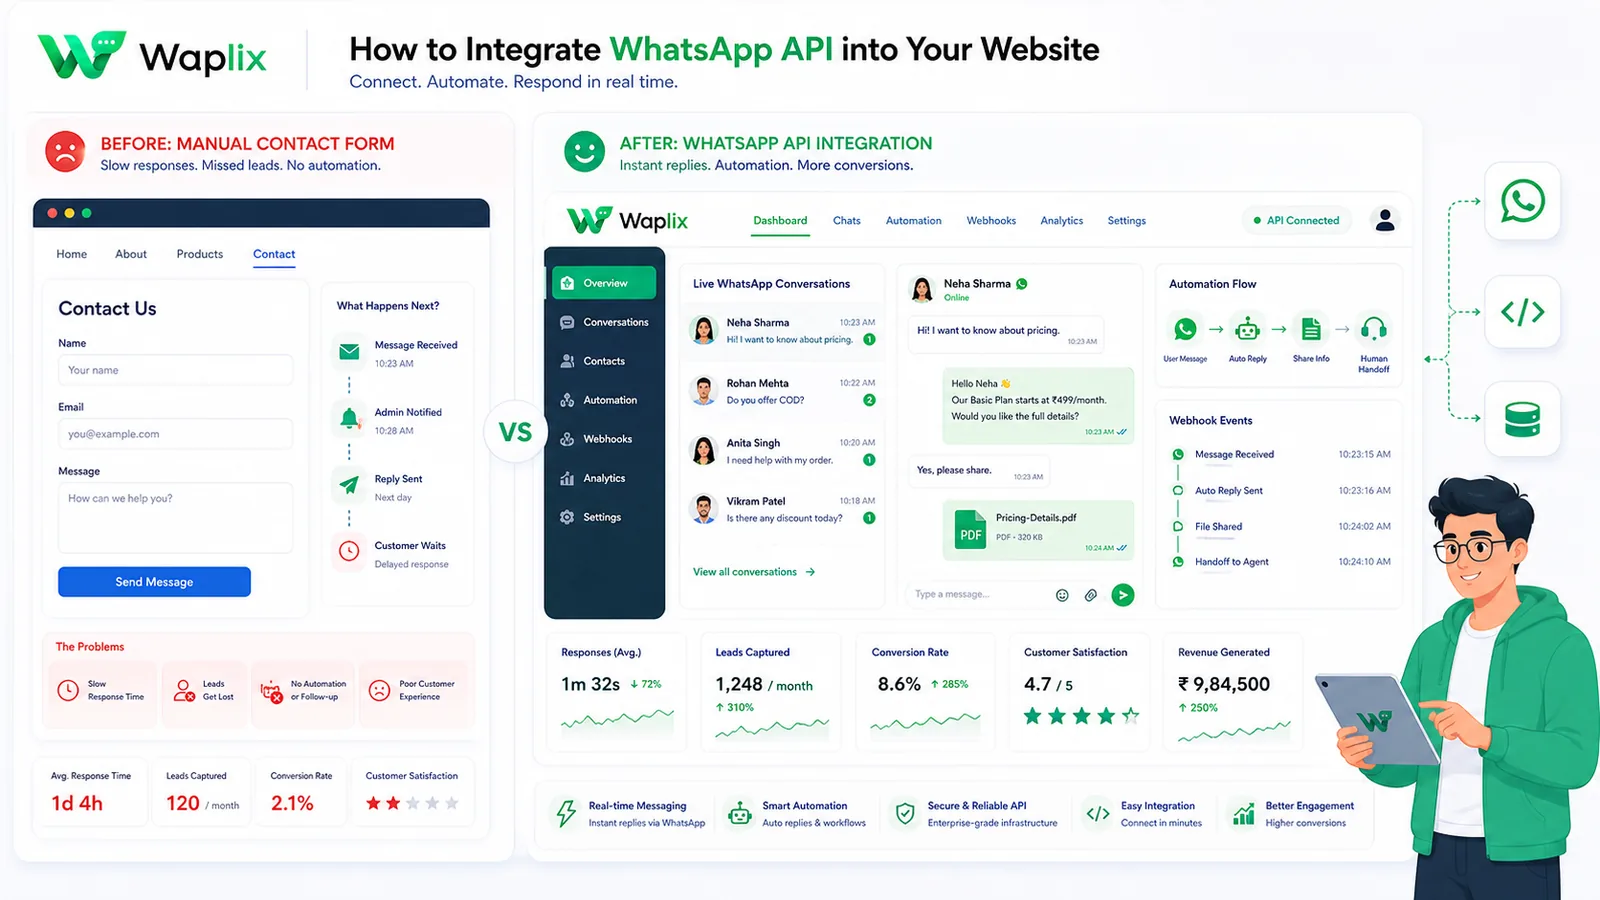
Convert website traffic into WhatsApp leads with Waplix
Websites are great for showcasing products, but they often fail at capturing leads who aren't ready to fill out a long contact form. Instant messaging bridges this gap. By offering website visitors a direct path to chat with your business via WhatsApp, you can resolve doubts immediately and secure customer details before they leave your site.
However, simply adding a standard chat link (wa.me) is only the beginning. To scale efficiently, businesses must implement structured integrations that capture lead metadata, verify compliance preferences, and coordinate follow-up reminders. When configured correctly, your web integration becomes a continuous funnel for customer acquisition.
In this guide, we will walk through the step-by-step process of integrating the WhatsApp API into your website. We will compare implementation choices, detail the lead capture sequence, share production-ready developer code, and explain compliance rules.
Overview: Website integrations range from direct links to complex, database-backed lead capture widgets. Using the Waplix platform simplifies authentication and secures compliance records.
Deploy custom chat buttons, trigger automated lead captures, and organize replies in a central team inbox.
There are multiple ways to add WhatsApp messaging to your website, depending on your development resources and lead tracking needs. Choose the method that best balances ease of deployment with operational control.
Integration Model
Setup Time
Lead Tracking
Developer Effort
Direct wa.me Link
Under 5 minutes
None. Raw app redirection.
None. Pure HTML anchor link.
Static Chat Button
15 minutes
Basic Google Analytics clicks.
Low. CSS layout adjustment.
Embedded Lead Widget
1-2 Hours
Detailed CRM data capture.
Medium. JavaScript form validation.
API-Driven Conversational Widget
1-2 Days
Complete database sync & logs.
High. Server-side API webhooks.
While a direct link is simple, it doesn't log visitor context. An embedded lead widget, on the other hand, collects key information before redirecting the customer to WhatsApp, allowing your team to identify leads when the conversation starts.
An API-driven lead widget connects website visitor details with incoming WhatsApp contact records in real-time.
The automated lead capture sequence
To convert anonymous website traffic into registered contacts, your website integration should follow a structured sequence. When a visitor interacts with the chat widget, their context is stored before launching the chat app.
1. User interaction
The visitor clicks the customized chat widget positioned at the bottom right corner of your webpage, indicating intent to connect with support or sales.
2. Context gathering
Rather than opening WhatsApp immediately, the widget displays a micro-form requesting the user's name, email, and topic of interest. This prevents anonymous spam and prepares your agents with conversation context.
3. Consent collection
A mandatory opt-in checkbox is displayed, ensuring the customer explicitly agrees to receive messages from your business in compliance with local privacy laws.
4. Redirection and payload dispatch
Once submitted, a background AJAX request posts the form values to your server, which logs the lead in your CRM. The browser then redirects the user to WhatsApp with a pre-filled message parameter.
Key Takeaway
Always capture contact details on your site before redirecting to WhatsApp. This guarantees that even if the customer drops off before sending a message in the app, you still retain their email or phone record for follow-ups.
Step-by-step setup guide
Follow this step-by-step roadmap to implement a secure, high-converting WhatsApp lead widget on your website.
01
Configure Waplix account
Sign up on Waplix, link your business number, and obtain your secure developer API key from the dashboard.
02
Design the widget markup
Add HTML structure for the floating button, contact form container, and submission elements to your site templates.
03
Write CSS positioning rules
Use fixed positioning, modern borders, and hover transitions to style the floating widget on all viewport widths.
04
Build form validation script
Write JavaScript to validate fields, capture consent checkmarks, and send database log dispatches via AJAX.
05
Set up CRM logging
Configure a backend endpoint to receive lead data and write records to your internal client databases.
06
Test and deploy
Verify execution across mobile and desktop environments. Monitor logs for submission data and opt-in histories.
Lead Capture Tip: Use page context tags in your JavaScript. If a visitor launches the chat from your pricing page, set the pre-filled text to "I have a question about the pricing plans" to route them straight to Sales.
Data routing workflow
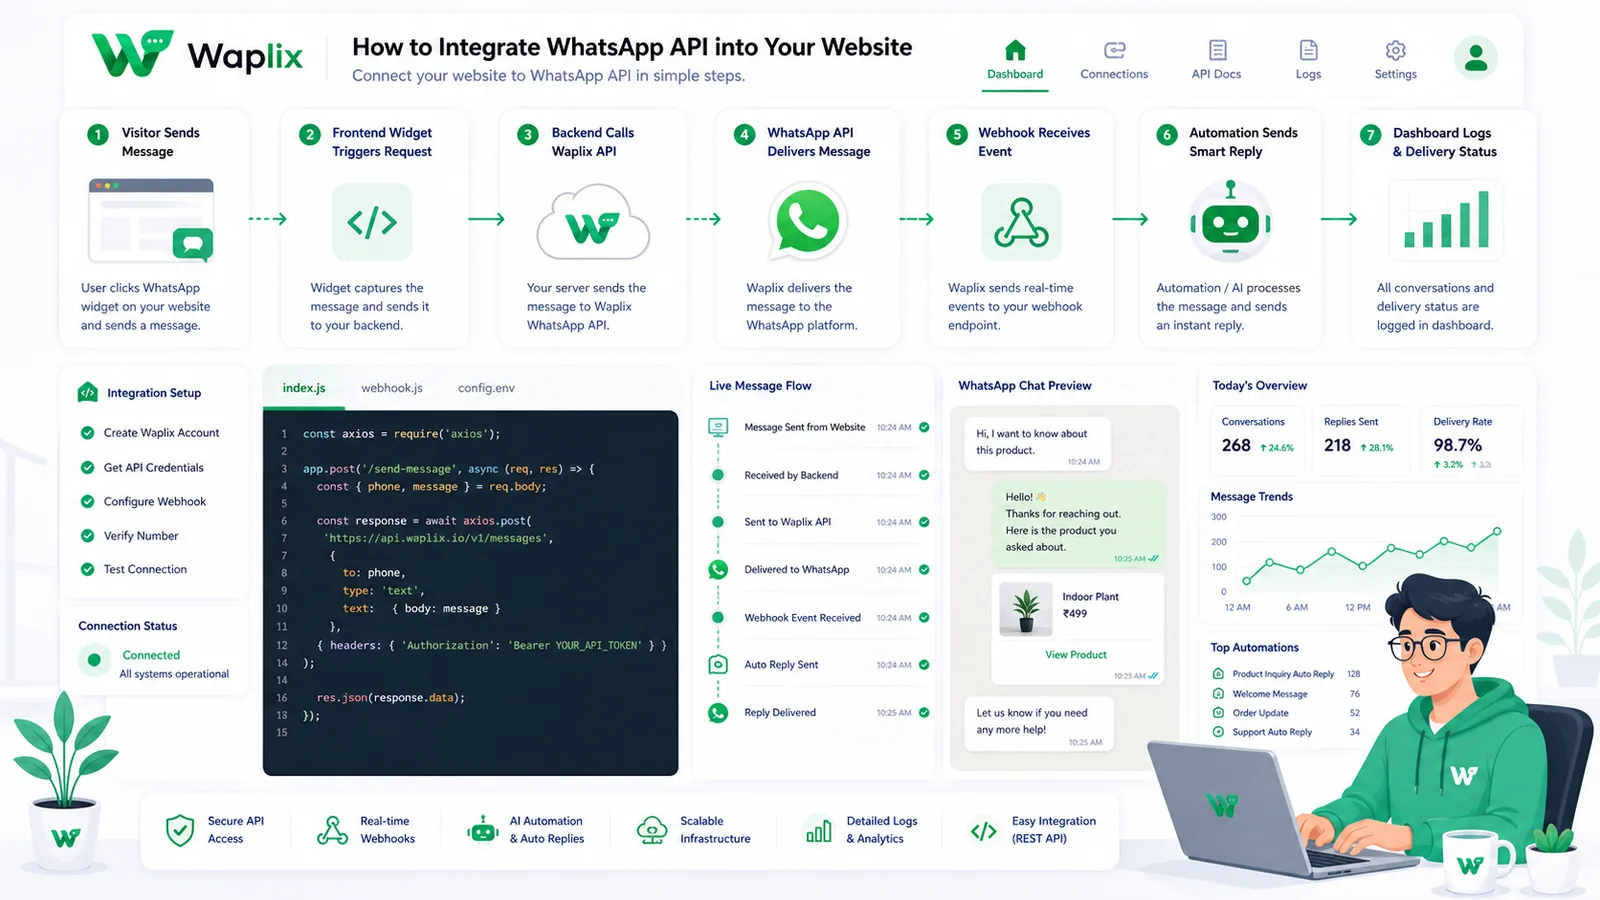
This flow chart outlines how client interaction context is validated, saved to server databases, and used to initialize the WhatsApp chat session.
The workflow ensures visitor information is saved in your CRM database before the user leaves your website domain.
Once the lead record is saved on your server, the widget generates a deep link containing your WhatsApp phone number and the URL-encoded pre-filled message. The user is then transitioned to WhatsApp Web or their mobile app with their message already typed in.
System architecture and CRM integrations
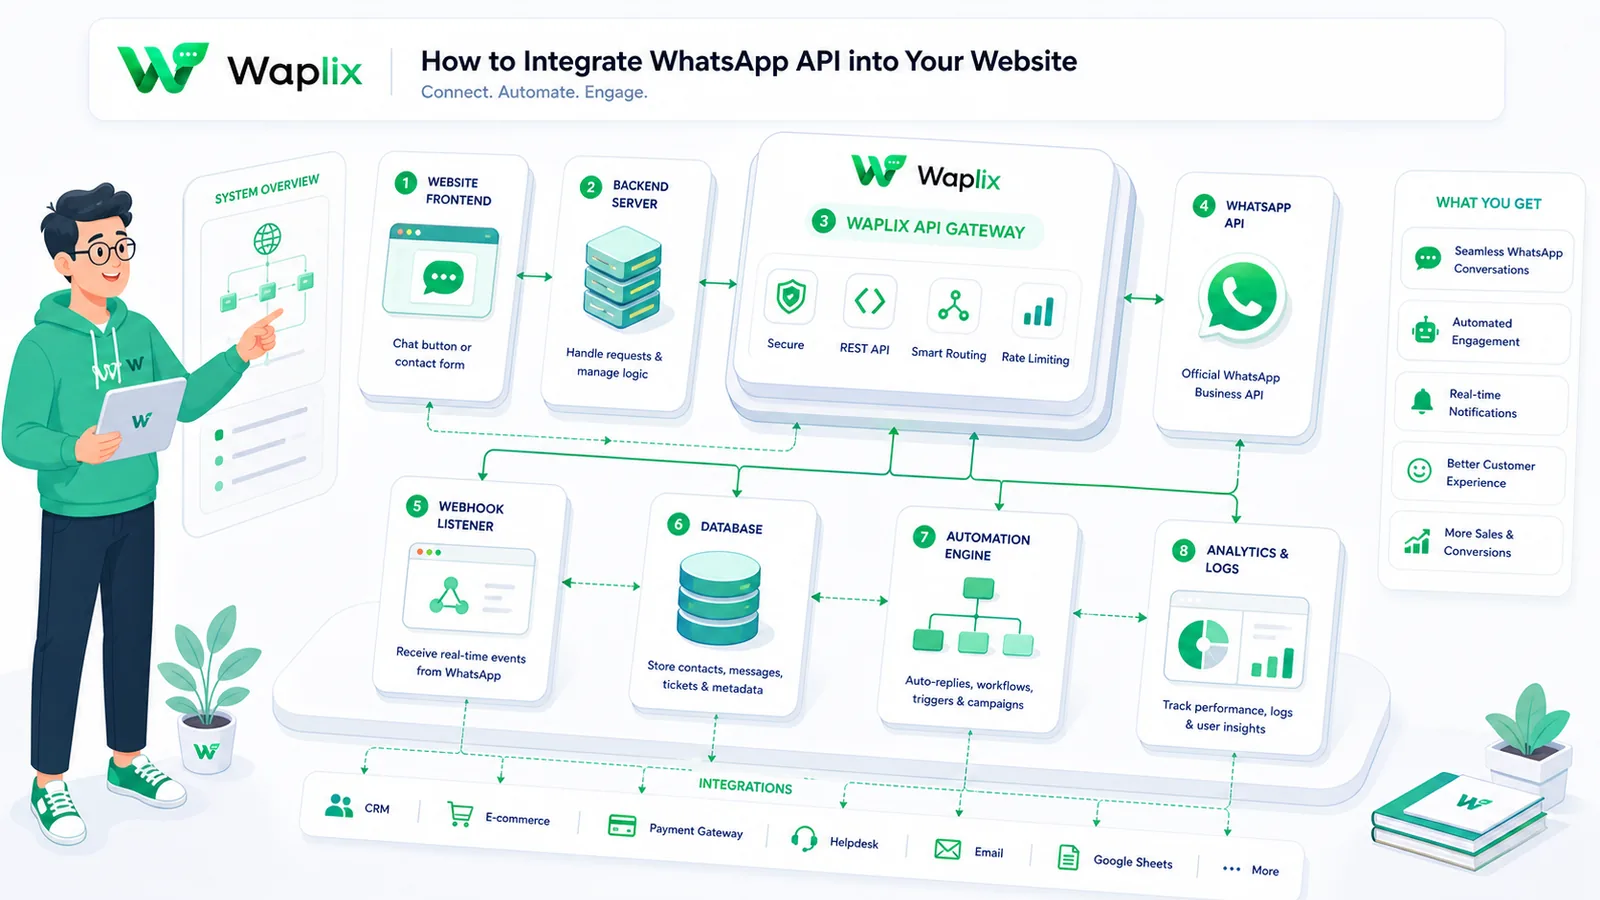
To run a professional sales flow, your website widget must connect seamlessly with your back-end CRM and the WhatsApp gateway.
The system routes client submissions to local database records while establishing API verification handshakes with Waplix.
Using Waplix as the API gateway simplifies this setup. Instead of managing complex webhooks directly with Meta's developer settings, Waplix translates responses, logs delivery states, and triggers auto-replies automatically.
Developer Integration: Widget markup, script, and lead capture controller
Below is a production-ready template for a floating HTML/JS widget and a corresponding PHP lead capture controller.
1. Floating HTML widget and validation script
Place this code in your site footer to render the widget and handle AJAX submissions.
This controller validates user consent, saves the lead details, and logs the opt-in state to your CRM.
<?php
declare(strict_types=1);

if ($_SERVER['REQUEST_METHOD'] !== 'POST') {
    http_response_code(405);
    exit;
}

$rawInput = file_get_contents('php://input');
$data = json_decode($rawInput, true);

if (!isset($data['name'], $data['email'], $data['phone'], $data['optin']) || !$data['optin']) {
    http_response_code(400);
    echo json_encode(['error' => 'Missing fields or consent not provided']);
    exit;
}

// Log to internal database
$leadSaved = logLeadToCRM(
    (string)$data['name'],
    (string)$data['email'],
    (string)$data['phone'],
    (bool)$data['optin']
);

if ($leadSaved) {
    http_response_code(200);
    echo json_encode(['status' => 'success']);
} else {
    http_response_code(500);
    echo json_encode(['error' => 'Failed to save lead']);
}

function logLeadToCRM(string $name, string $email, string $phone, bool $optin): bool {
    // Write database logging logic here
    return true;
}
?>
Developer Security Note: Sanitize all incoming fields in your controller before logging values to your database. Never accept user parameters directly into raw SQL statements without using parameterized queries.
Operating website chat buttons requires strict adherence to Meta's developer terms and global privacy laws.
Explicit opt-in. You must confirm that website visitors actively check a box agreeing to receive messages before prompting them to launch WhatsApp.
Clear branding. Do not spoof your identity. Ensure your click-to-chat widgets clearly state your business name and details.
Opt-out instructions. When a chat begins, verify that your auto-reply mentions how a user can stop messages (e.g., "Reply STOP to opt out").
Data protection. Do not transmit credit card numbers or sensitive health credentials via widget URL variables.
Compliance Note: This guide provides operational advice, not legal counsel. Regulations vary by country and region. Always consult qualified legal advisors to ensure your messaging strategies comply with local laws.
How Waplix manages API credentials securely
Waplix provides small businesses with official WhatsApp API access, eliminating the complexity of managing server infrastructure. Build workflows, manage templates, route replies to a shared inbox, and view campaign analytics—all from a single, unified platform.
Replace this with a real Waplix screenshot showing execution logs, curl payload responses, and webhook execution metrics.
Suggested screenshot: Auditing cURL response codes and webhook executions in the Waplix sandbox logs console.
Common integration mistakes
Missing opt-in tracking. Opening a wa.me link directly without keeping records of customer consent.
Slow layout rendering. Loading external widget dependencies that block your site's main threat loop.
Unstructured query variables. Failing to URL-encode pre-filled message parameters, resulting in broken links.
No desktop fallback. Routing users to deep links that crash on desktop browsers when WhatsApp Web is not configured.
Ignoring drop-off rates. Neglecting to audit how many users open the widget but fail to complete the chat redirection.
Best practices for website integrations
Pre-fill client context
Always pre-populate the text input with specific user inquiry variables.
Enforce responsive styling
Optimize form elements for touch gestures on tablets and mobile screens.
Verify consent on-site
Save checked opt-in timestamps in database rows prior to launching WhatsApp.
Route by page origin
Analyze widget URL origins to route sales queries straight to domain experts.
Conclusion and next steps
Integrating a WhatsApp API click-to-chat widget with your website is an effective way to convert passive visitors into leads. By collecting contact details, securing consent, and routing chats through Waplix, you can build a stable, compliant pipeline that grows your sales.
To begin, configure your Waplix developer keys, style your floating widget form, and test the deep link redirections on both mobile and desktop screens.
Build secure WhatsApp integrations with Waplix
Create a developer account, connect your business number, and automate customer support at scale.
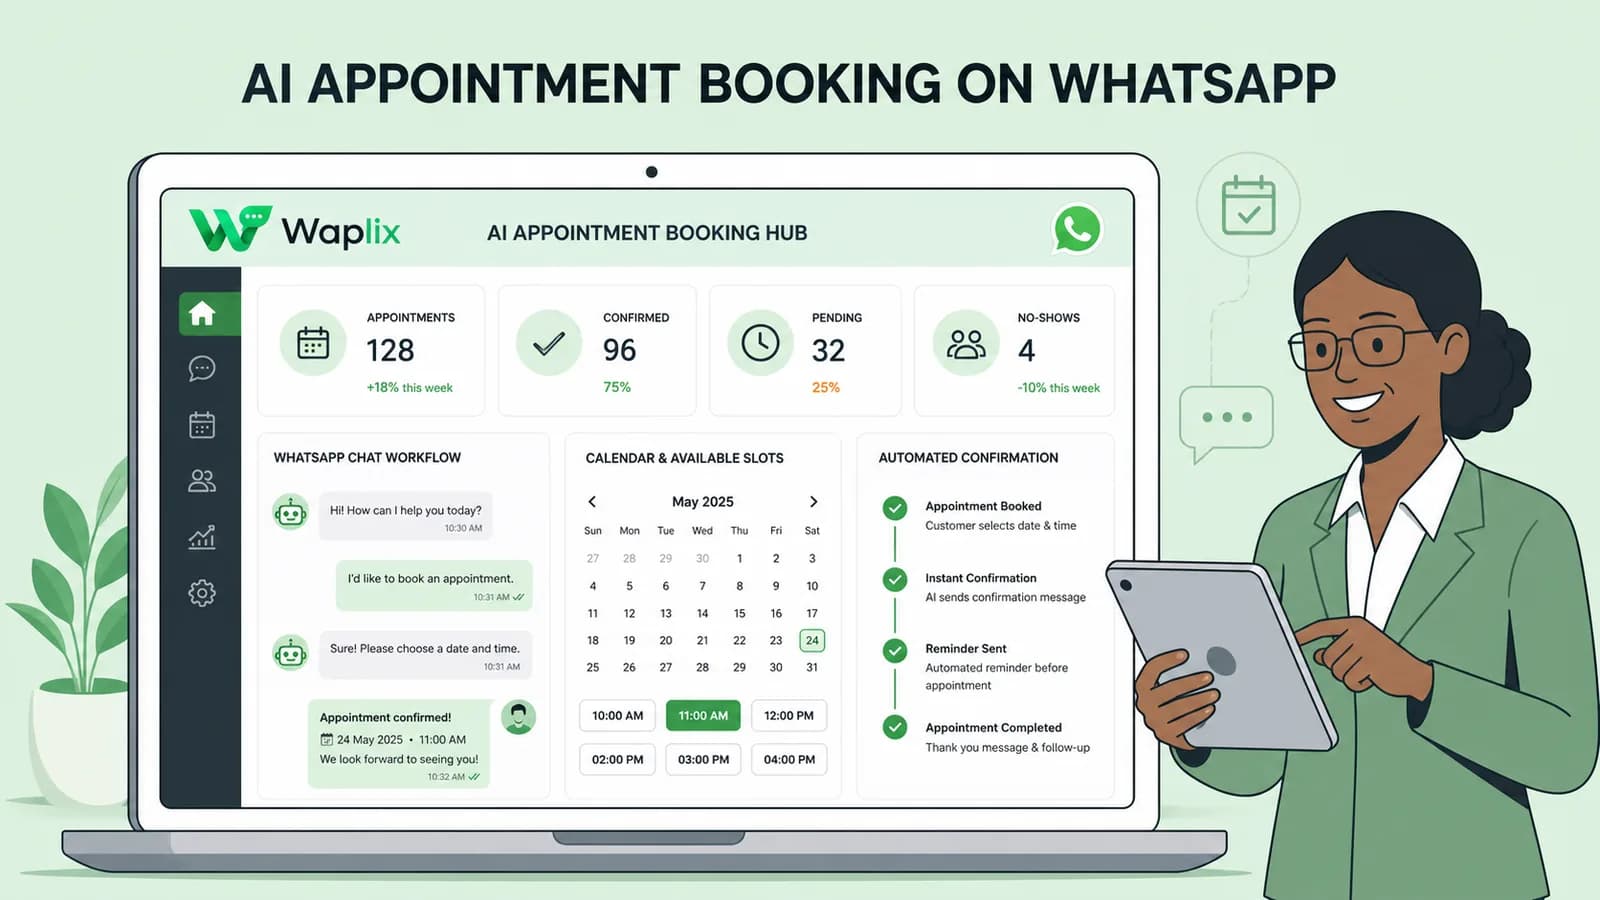
Learn how to build AI-driven booking systems on WhatsApp, connecting calendar databases to conversational agents, automating updates, and reducing client no-shows.
Discover practical ways small businesses can leverage no-code AI automation on WhatsApp to manage customer conversations, qualify prospects, and coordinate bookings 24/7.
Explore the technology behind AI memory and context retention, learning how session databases personalization results in better, trust-filled client interactions.